Friday, September 9, 2011

Making hills

Most of my wargaming table hills are styrofoam mounds cut with a foam cutter and flocked. I hate these hills. They're messy and a bit fragile. I hosted a gaming session with a few friends from out of town. They supplied the terrain and gaming pieces. The one thing that caught my attention was the hills they used. These things were indestructible! To demonstate this one hill was banged quite hard on the back of the chair. Amazing!
The photo above shows one of the hills in action. So how are they made? The list of ingredients is the following:
  1. upholstery foam padding.
  2. terrycloth towels
  3. white glue
  4. hot glue gun
  5. spray paint
The upholstery foam is a bit of a bugger to cut. I found an electric carving knife (used for slicing up the turkey) works best. Once you have the shape of your hill place it on a flat surface. Make sure it's flat to the surface. Now take your terrycloth towel and drape it over the foam. Take your glue gun and lift up the towel at one end and start gluing it down to the foam. Now trim the towel around the edges of the foam hill. Make sure you leave at least a 1/2" past the foam edge.
The next step is to fill a pint size container with 50/50 ratio of white glue and water. Brush this mix over your terryclothed hill. Let dry over night. It will be hard to touch but have some flexibility in it.
The last step is spray painting it. I used 2 shades and later dry brushed on some lighter colours to highlight the cloth texture.
My first batch of hills.
The underside of a hill. Note the towel is trimmed past the foam. This will make sure it sits flat.
One of my hills on the gaming table. The towel texture replaces flocking and eliminates the mess.
For more details on how to make these please see my friend's blog.
Hill making 101

The great thing about these hills is how cheap it costs to make. I bought my towels at a dollar store for a few bucks. You will go through a lot of hot glue sticks and white glue. I recommend you invest in a good glue gun. It will make it easier. I think I made about 7 hills for a combined cost of $10.
I highly recommend this technique. Give it a try!

Get across the bridge!

I'm still working on my home grown rules and as you know you have to play test and play test. Once you've done that you play test again!
So the scenario I picked was a fictional one in a historical setting. Western France '44. The allies have to get control of some cross roads at a shelled out town. An earlier recce patrol spotted a platoon of Germans in the town with unknown support.
Looking from the Allied side towards the town.
The Allies consist of a mix of numerous equipment. 2 Canadian infantry squads, 1 American squad, and lots of tanks! Remember I'm testing my ruleset so I've included a mix of equipment that normally wouldn't be seen together. The mix consists of 4 Shermans, a Firefly, and a few Churchills.
The Shermans decide to rush the bridge. Why not? What can be on the other side? An American squad moves up on the right.
The only way across for armour is the bridge. The infantry can ford across at a couple of crossings.
A mortar lays down some smoke on the other side of the bridge. The ford to the right of the bridge is undefended!
Once it was determined that the bridge isn't mined and a ford to the right of it isn't guarded the Allies rush ahead. What they didn't realize was that a squad of Germans started to move up to the bridge while leaving a clear lane of fire for their Pak 40 gun. A Sd Kfz 250/9 was also moving up to lend support and possibly challenge any ford crossings. It was too late.
Getting across. The smoke screen doesn't help.
The Pak 40 makes it's presence known and immobilizes the first Sherman across. The next 2 Shermans break right and left and look for cover.
Fighting for the ford crossing.
The Sherman that broke right had it's turret take a hit. A critical hit roll was required and the results where good. The driver didn't bail out but managed to back up his damaged tank over the hill and into cover. Meanwhile a squad of Fallschirmjagers rushed the hill above the ford to see if they can stop the Allied squad from getting across. They were too late and got into a nasty firefight with the Americans and were wiped out to a man. At the bridge the immobilized Sherman now had it's main gun knocked out and was out of action. In then nick of time 2 Churchill Mk VII's manage to get across the bridge.
The Shermans that went left manage to enter the town.

A captured Firefly returns fire!
Hiding in the back the Germans make effective use of a captured Firefly to hold back the Allies.
A panzershreck team in the ruins.
The best the Allies can do is pin down the Pak 40. The Germans rush up a Puma but she's out of her league and eventually gets knocked out. A Mk IV also supporting the Pak 40 gets knocked out too.

And that's as far as we got. The Allies did manage to knock out the enemy Firefly and start to move through the town. What other surprises do the Germans have? 
 
My ruleset is coming together nice. They are squad level (1 figure = 1 man, 1 vehicle = 1 vehicle, etc). The one thing I wanted to attain was a fast pace without simplifying the rules to the point of stupidity. One way to do this is to allow combined fire by an infantry squad. Just add up all their weapon values minus the target's defense attributes and roll for each enemy figure. Armour vs armour works pretty fast too. Roll for a hit. If successful then determine the attack value vs the defense value and roll for penetration. There's more to the rules than what I briefly described. I'll have to do a more detailed description later.

So once the rules are finished I'll offer them up to whom ever wants to try them.

Monday, June 13, 2011

Paper buildings everywhere!

I believe the best looking Western Europe or even Eastern Europe battle terrains for WW2 should have lots and lots of destruction. That means ripped up fields, buildings in ruins, and your basic war garbage everywhere.
Okay one thing at a time. How do I create a shelled out Normandy village with minimal cost? Why it's paper buildings of course! On the Miniature page I discovered an ad for a shelled out building you can order online and download a PDF copy. The actual site of the creator of such products is
Dave Graffam's paper models.

Now you can buy one building as a test for on the cheap but I was fascinated with his product so I bought the bundle pack that contains 17 structure kits.
Dave's instructions state that you should print off your building parts on card stock to attain a level of rigidness you'd need. There's still one problem with this. The building walls still look too thin BUT if you want a quick building then follow his instructions. I decided to take it one step further. I'd print off my building parts on regular printer paper and glue the cut out parts onto foam board. I decided to use peel and stick floor tiles for floors, bases, and roofs. The reason for this is I didn't want the building to start looking like a thick bunker and I figure the thin floor tile will be easy to fasten to the build walls by cutting slots in the foam board and still offer a level of strength needed.
For my demo here I was planning on building one of the large buildings. The shelled out church. I print off the brick type I wanted. This document comes in 3 brick pattern types.
One thing I have to comment on with these PDF documents is that Dave has taken advantage of multi layering. What this means is before you print off the page you can chose what brick type or other building attributes you want to use. You can add windows or doors or my favorite, burn marks! The other point I'd like to mention is that in the instructions a scale chart is provided so can adjust the image size to your game scale. In my case my WW2 figures are 1/72 so the 20mm or 65% of original size was I thought a little too small. I settled on 75%.
Now everything is printed off and ready for cutting.
The tools of my trade are an exacto knife, ruler, glue stick, white glue, white wood filler, and a hot glue gun. The floors and roofs as I mentioned are placed on floor tiles. These can be cut using scissors or tin snips. I found the foam board can be cut with an exacto knife. I use the hot glue gun to glue all the walls together and fasten the buildings to the bottom floor. I also use the glue gun to fasten the roofs to the buildings. One thing to take note on is when I put two walls together at a corner I will cut one of the walls the thickness of the foam board and remove only one side. This will give you a clean corner to glue together. For the exposed edges of the foam board I give it a coating of white wood filler. You can get wood filler in a squeeze tube at building centers in numerous colours but found white was the best because it will take any colour you decide to paint it with.
The artist's rendering from the instructions

My finished building

From the opposite side

So with the multi layering function in PDF the volume of different buildings is huge. In a about a months worth of construction I've put together about 13 different structures. Below are a sampling of some of them.
The Tower Ruin
From the other side.
The Wrecked House
From the opposite side
These wall sections didn't come with bases. I added some print outs of rubbled roads. Another download that can be found on at Wargame Vault wargaming site.
The Sniper's wall
The Split Ruin
I'll be doing a post later when I use these buildings in my first game with them.

So to conclude I highly recommend these building PDF's. For the amount of buildings you can create they're relatively inexpensive. The 17 document files you get in the bundle works out to $2.35 USD so with materials your building costs are below $4.00 for each structure. Finally the most important feature of these PDF's is you can change the look of the structure before you print them off. They can be adapted to numerous scales and they look great.

Sunday, June 12, 2011

ASL hybrid game

This past Saturday I had a couple of friends in from London who were itching to show me their Advanced Squad Leader rules adapted to gaming miniatures. Using 1/72 scale figures and armour we did a late 1944 Eastern Front scenario. Because ASL is a very detailed rule set my friend Greg (big ASL nut) sort of dumbed them down to a faster playing concept. He's already tried them out at a couple of Hotlead gaming conventions.
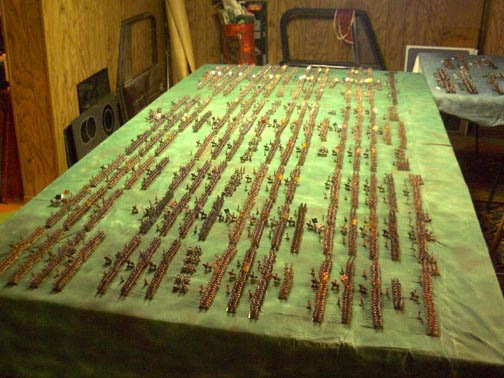
We set up the table with Rich's terrain and Greg's figures. The scenario was for a platoon of Germans holding a key crossroads from the Russian hordes and hoping for reinforcements.
The Russians advanced with 2 SU-122's and heavy infantry support.
A squad of Germans with a medium machine gun manage to hold off the Russian infantry while a Stug IIIG get's a hit on the 3rd try on one of the SU-122's. Eventually the Russians close on the German squad in the house and start a melee. While in melee the rest of the Russian forces fire at the wrestling mass and wipe them out. Friendly fire be damned!
The hill to the left of this ruined house is another key objective in the Russian's path. They manage to scare away a Panzershreck team but before they do the Panzershreck team takes out another SU-122.
Of the 4 objectives the Russians manage to get control of 3 of them. 2 hills and only 1 of 2 ruined houses near the crossroads.The photo below shows the view from the Russian perspective.
The German armour never made it close to the crossroads but did manage to knock out 5 Russian tanks.
The Stug III G seen in the photo above got 3 kills in the game before a T34-85 nailed it. A T34 made it to the base of the second hill to secure it. I don't think this tank would have survived much longer. There were 2 Mk IV's who acquired it and it was only a matter of time before it was a smoking ruin. The game ended after about 4 hours of play with a Russian victory on points over the Germans. Even though the Russians captured 3 out of 4 objectives they barely squeaked out a victory. They had lost a lot of armour compared to the Germans.

So how were the ASL rules adapted to miniatures? Well having 2 people playing who knew the rules inside and out helped. They even knew from memory the 'To hit' chart! I'm not sure if I like these rules or not. In other words the jury is still out. My current skirmish level rules use single figures rather than a base containing 3 figures. I still like the 1 figure equals 1 man theme. I did think the mechanics worked well. They had a nice balance of complexity over simplicity. I think though this game maybe a little too detailed for gaming conventions.

Saturday, March 26, 2011

Hotlead 2011

Greetings all,
Bob and myself ventured off to the Hotlead wargaming convention in Stratford Ontario today. This convention is getting better every year. It's small by Coldwars / Historicon standards but living in Toronto it's a hell of a lot closer to go to (1 1/2 hours down the old 401 highway). 
Bob and I put on a War of 1812 lake action game which I'll present on a separate post.

The convention had all sorts of games from your sci-fi Warhammer crap to your historical games.
One I thought was rather interesting was this WW1 Palestine game in 25mm. I didn't stick around to see how it played but from what I could see there were skirmishers going up the rail line while reinforcements came up from behind.
A closeup of the British reinforcements coming up. Definitely an interesting scenario.
Next was an ECW game in 25mm. The beautiful paint job on these mini's made up for the lack of terrain.

A rarity in gaming. A Napoleonic skirmish game in 25mm. I found the mottled terrain mat was a bit distracting but never the less a beautiful game.
I found the sparse terrain in this WW2 North African 15mm game bang on. Tanks in this theater were truly ships of the desert.
Finally another 25mm AWI skirmish game. I love all the trees and bushes. A true skirmish environment. I also like the look of the partially harvested wheat fields!
Hotlead is growing. If they get any larger they'll have to take over another ballroom. I'll definitely be back next year.

Sunday, December 5, 2010

Bob's stuff part II

I mentioned in my previous post that Bob has a lead army in 15mm painted up for wargaming. We decided about 10 years ago to build up our armies for wargaming the War of 1812. The scale we chose was 1 to 10 in 15mm. A group of us were in on this plan and decided to paint 1 US and one British regiment. By doing this we'd have enough painted to do the Battle of Lundy's Lane which was one of the largest in the war. We figured that if we had enough painted for that battle you had enough for all the others.
Well Bob being the painting machine he is he went into hyper mode and painted every British regiment that served in North America. Don't believe me? Check this out.
He's also started on the US forces too.

Have we wargamed with these yet? Sadly no....

Saturday, December 4, 2010

Bob's gone crazy!

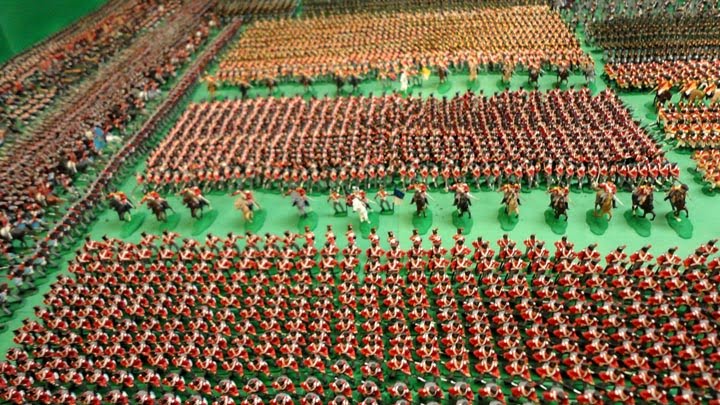
My good friend Bob Fraser who's been battling cancer has been shacked up in his house for the past 3 months while recovering from his treatments. While fighting this disease and boredom he decided to put out a large chunk of his painted up Airfix plastic British Napoleonic figures.No he didn't paint these in those months stuck at home. This is the work of maybe 15 to 20 years of constant painting.
One of Bob's dreams was to see what a British regiment looked like on the field. This quickly morphed into what a brigade and then a division looked like. Eventually he worked his way up to a corps!He also have a division of cavalry painted up too but aren't displayed on the table. These figures haven't been used in a wargame.

For wargaming he has painted up every British regiment that served in North America during the war of 1812 in 15mm lead. Those are in a 1 to 10 scale. He's working on the US forces there too and has about 14 regiments painted up.
For a video on this 'army' click here.